PRODUCTS FOR PCO INSTALLERS
NETTING HARDWARE
NETTING HARDWARE
Each installation is unique and requires on-site ingenuity. Proper installation is challenging if every step isn’t meticulously planned. Always double-check your measurements before cutting the netting and ensure you have all the necessary materials before starting.
Corner/Primary attachments are under the most tension and must be the most robust component of the system. Ensure that all attachments are firmly anchored. A primary connection is required for every new span of netting. Install primary attachments every 45 to 50 feet for larger jobs.
These tighten the mounting cable and hold it against the structure to prevent bowing and bird access. They should be installed every 1.5 to 2.0 feet, and for smaller birds, such as sparrows and swallows, we recommend every 1.5 feet. They can be used in wood or concrete structures.
The mounting cable frames the entire area to be sectioned off by netting. Ferrules secure the cable where it attaches to the corner attachments. Slide the ferrules onto the cable before forming your connecting loop and secure it with the ratchet tool. Use at least two ferrules per loop to ensure the strength and durability of the perimeter cable.
Turnbuckles must be well-anchored as they are subject to a great deal of tension between the cable and the corner attachments. Ensure your components are well secured. When installing, make sure the turnbuckles are all the way open. Pull the cable as tight as possible through the turnbuckle. Before tightening, remove all slack in the cable, take up as much tension as possible, and fasten with a screwdriver. Caution: Do not overtighten turnbuckles, which may result in fasteners or eyehooks pulling out. Use four ferrules for every length of cable.
Net rings attach the netting to the cable. Using the ring tool, secure one ring per square of netting. Net rings can also connect netting seams. Be sure to overlap the netting at the seams by at least six inches.
Begin working from one side, making your way to the other. Do not attempt to meet in the middle while attaching netting. Start in one corner and attach the netting horizontally using the net rings. Once you have a few feet in place, return to the corner and begin securing a few feet vertically to establish a strong corner. After finishing the top and side, you can complete the remaining sides. Once the netting is attached, inspect the cable for bowing or large gaps. If any inconsistencies exist, carefully tighten your turnbuckles to close any gaps.
This is a general overview of Bird-X PE Bird Net Installation. Complicated projects may require additional materials and instruction. If you need more information, please call your Bird-X representative for further assistance.

500’ Spool – 3/32”, 49 Strand Cable. Cable, 7×7, 3/32” (2mm) diameter with 920 lb. tensile.
3/32” Stainless Steel
MTG-CABLE-SS
3/32” Galvanized
MTG-CABLE
1/16” Stainless Steel
MTG-CABLE-SS-1/16
1/8” Stainless Steel
MTG-CABLE-SS-1/8

For wood or thick sheet metal surfaces. Corner/end attachment. 17/32” I.D., 1” lag thread.
Stainless Steel (20 pack)
MTG-SCREW-MD-SS

Corner/end attachment for an I-beam or other thick metal.
Stainless Steel (10 pack)
MTG-BOLT-MD-SS

This hammer-in attachment is the strongest attachment for stone, concrete or solid brick. It does not require a plastic anchor sleeve; the bent shaft holds it securely in place. Zinc coated.
304 Stainless Steel Net Spikes, Small (100 pack)
MTG-SPIKES-SS
Galvanized Net Spikes, Small (100 pack)
MTG-SPIKES

Corner/end attachment. M6 high load bearing expansion bolt anchor. For most masonry, stone, or concrete. This M6 netbolt needs a 14mm drill bit.
Stainless Steel (10 pack)
MTG-NETBOLT-MD-SS

Intermediate connections for wood. 1/2” lag eye screw
Stainless (100 pack)
MTG-LAG-SCREW-SS

This clamp defines the term “heavy duty”. Your best bet for larger net installation, this clamp can hold up to 630 pounds of tensioned weight. Bolt to an I-beam or other steel structure and run your cable inside the jaws.
Stainless Steel Clamp 1″ (10 pack)
MTG-CLAMP-1-SS
Stainless Steel Clamp 2″ (10 pack)
MTG-CLAMP-2-SS

This strong, hammer-on clip allows you to attach cable to hard-to-drill steel beams. Hammer the clip into the edge of an I-beam with the cable running through the jaws (not through the hole), and your cable is secure.
1/8”–1/4” (100 pack)
MTG-GIRD-1
5/16”–1/2” (100 pack)
MTG-GIRD-2
9/16”–3/4” (100 pack)
MTG-GIRD-4
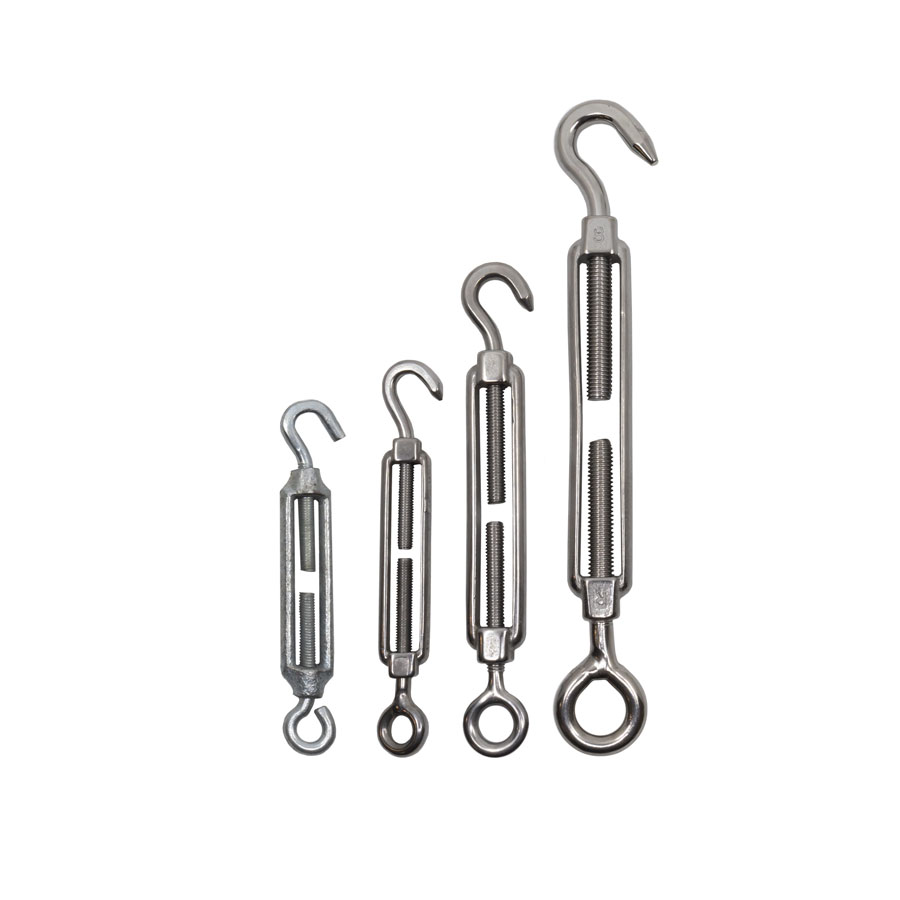
Hook-and-eye turnbuckles for tensioning Net Cable. Medium, 1/4” x 3-1/2”.
Stainless Steel Turnbuckles (10 pack)
MTG-TURN-SM-SS
MTG-TURN-MD-SS
MTG-TURN-LG-SS
Galvanized Turnbuckles (10 pack)
MTG-TURN-SM

Double Sleeve Zinc/Copper Ferrules. For connecting short cable runs (3/32”). Ratchet Crimper required.
Copper (100 pack)
MTG-FERR-C
Aluminum (100 pack)
MTG-FERR

1.25” bracket is used as an end or intermediate bracket and installed as either a permanent fixture or as a quick-release cable holder.
Stainless Steel (100 pack)
MTG-BRACKET-SS

Used as a corner or intermediate attachment or as a quick-release cable holder.
MTG-BRACKET-HILTI PIN

Connect pieces of netting together securely with stainless steel clips.
3/4” Stainless Steel (100 pack)
MTG-ACCESS-CLIP
2” Stainless Steel (100 pack)
MTG-ACCESS-CLIP2

Net rings secure seams and fasten the netting to the cable, zippers, etc. Ring Tool required.
Stainless Steel (2,500 pack)
MTG-RINGS-SS
Galvanized (2,500 pack)
MTG-RINGS
Net rings secure seams and fasten the netting to the cable, zippers, etc. For use with the Battery-Powered Ring Tool.
Stainless Steel (10,000 pack)
MTG-BAT-RINGS

15 gauge 3/4” C-Ring. Magazine capacity of 100. 1000 rings per battery charge. For use with MTG-BAT-RINGS.

16 gauge 3/4” C-Ring. Magazine capacity of 125. 1/2” tool also available.
MTG-PN-RINGTOOL-3/4

11/16” 16g C-Rings. Magazine capacity of 50 rings.
MTG-MNL-RINGTOOL

Used to cut mounting cable.
MTG-CUT-TOOL

Hand operated, ratcheting crimper for ferrules.
MTG-RATCHET

UV-resistant black zipper. Fasten to netting with net rings and ring tool.
1’ Black, 5MM
MTG-ZIPPER-1
3’ Black, 5MM
MTG-ZIPPER3
6’ Black, 5MM
MTG-ZIPPER
Custom size
MTG-ZIPPER-C